Wind Turbine Not Charging Battery: Complete Diagnostic Guide
When your wind turbine fails to charge its battery bank, the problem usually lies in wiring, the charge controller, battery condition, or mechanical issues. This guide walks through systematic diagnosis and fixes.
Share this article
windturbinehome.com/s/6fca42

A wind turbine spinning silently in the breeze should be pushing electrons into your battery bank. When it isn't, the fault typically sits in one of four places: the turbine-to-controller wiring, the charge controller itself, the battery bank's health, or mechanical drag inside the turbine head. By testing voltage at three measurement points—turbine output, controller input, and battery terminals—most owners can isolate the problem without hiring an electrician. This walkthrough follows the signal path from spinning blades to stored energy, showing where electrons get lost and how to recover them.
Check the obvious culprits first
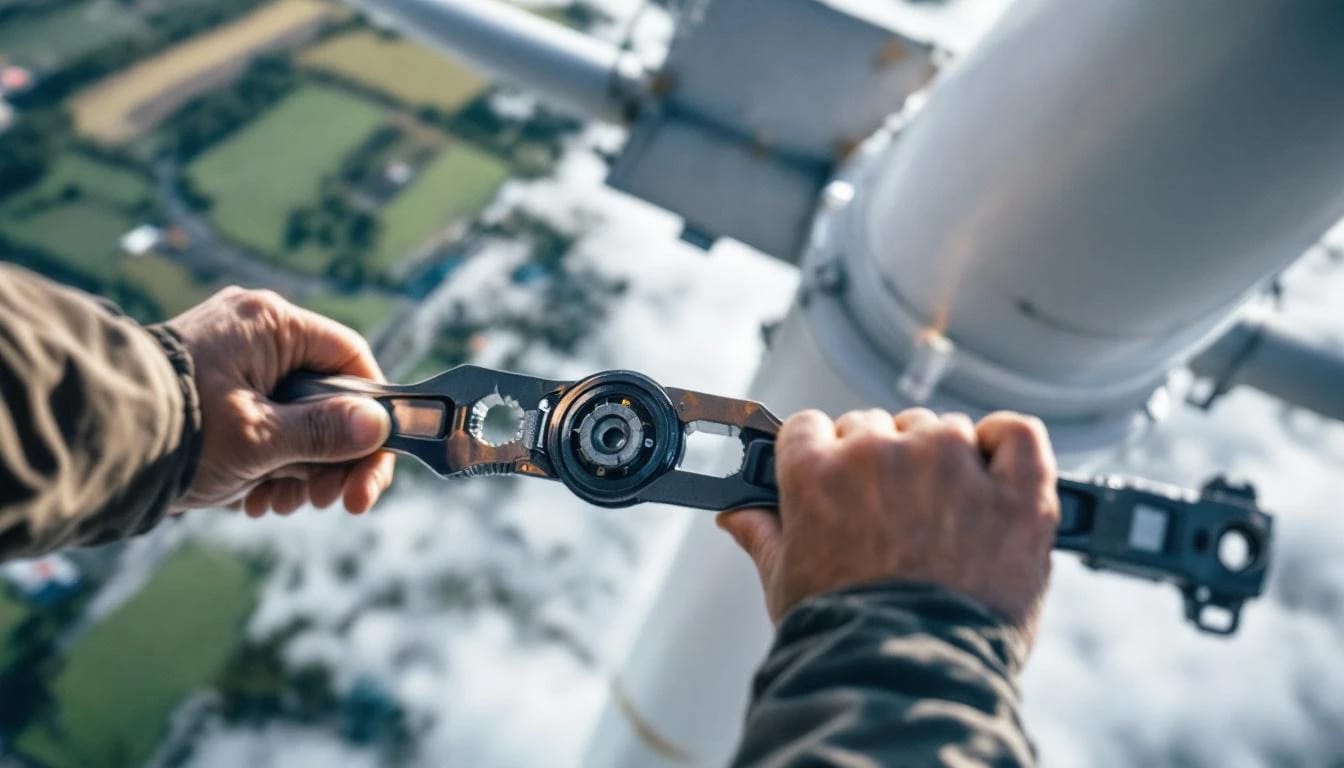
Before disassembling anything, confirm the turbine actually spins. A seized bearing or locked brake will stop generation regardless of wiring health. Stand beneath the turbine on a day with steady 12+ mph wind and verify blade rotation. If the rotor is frozen, troubleshooting turbine mechanical noise and vibration becomes the priority.
Next, inspect the dump-load resistor. Many small wind charge controllers—especially those from Primus, Bergey, and Aeolos—route excess energy to a heating element when batteries reach full charge. If the dump load failed closed (shorted), all turbine output flows to the resistor instead of the battery. Touch the dump-load housing; a unit hot enough to burn skin while batteries sit at 12.2 V indicates a stuck relay or shorted MOSFET inside the controller. Disconnect the dump-load wires at the controller and retest battery charging. If voltage now climbs, replace the controller or repair the solid-state switch.
Check battery terminal voltage with a calibrated multimeter. A healthy 12 V lead-acid bank should read 12.6–12.8 V at rest, 24 V lithium iron phosphate should show 26.4–27.2 V. Readings below 11.8 V (12 V nominal) or 20 V (24 V nominal) suggest sulfation or cell damage that prevents charge acceptance. Batteries in this state will not accept current even when the turbine operates perfectly.
Test voltage at three critical points
Systematic diagnosis follows the power path. You'll need a multimeter capable of measuring 0–80 VDC (for small turbines, open-circuit voltage can spike to 70+ V in high wind) and a notepad to record readings.
Point 1: Turbine output. Disconnect the turbine leads from the charge controller. In 15+ mph wind, measure voltage between the two or three turbine wires (two for most vertical-axis models, three for permanent-magnet alternator horizontal-axis units). A functioning turbine should produce 15–45 VAC (yes, AC—most small turbines generate three-phase or single-phase alternating current before the controller rectifies it). If you read zero volts, the problem sits inside the turbine: shorted windings, corroded slip rings, or damaged rectifier diodes. Turbines with built-in rectifiers should show 18–55 VDC instead of AC.
Point 2: Controller input. Reconnect the turbine leads. Measure voltage at the controller's input terminals while wind speed holds steady above cut-in (typically 7–9 mph). Readings should match the turbine output voltage within 0.5 V. A discrepancy of 2+ V indicates resistive loss in the cable run—either undersized wire, a corroded crimp connector, or a loose terminal block. NEC Article 705.12 requires conductors to limit voltage drop to 3% between source and controller; for a 400 W turbine generating 28 V, that's 0.84 V maximum drop. Calculate actual drop: measure at turbine, measure at controller, subtract.
Point 3: Controller output. Measure at the controller's battery terminals (output side). In charging mode, you should see battery voltage plus 0.5–2.5 V (the controller's bulk-charge setpoint). For a 12 V system, expect 14.2–14.8 V during absorption phase. If the controller input shows 28 V but the output sits at 12.4 V without rising, the controller has failed internally—likely a blown rectifier, damaged IGBTs, or failed gate driver. Controllers from Pikasola and smaller Chinese brands have higher failure rates than Xantrex or Morningstar units, but all solid-state electronics degrade over time.
Diagnose charge-controller failure modes
Wind turbine charge controllers differ from solar MPPT units. They must dissipate energy during over-speed conditions (gusts beyond rated wind speed) and survive voltage spikes when loads disconnect suddenly. These stresses create predictable failure patterns.
Shorted dump-load circuit: The controller passes turbine power directly to the resistor bank instead of batteries. Symptoms include a scalding-hot dump load while batteries discharge, and battery voltage that never exceeds resting voltage. Measure voltage across the dump-load resistor; if it matches turbine output voltage continuously, the dump transistor has failed closed. Replacement controllers from Bergey (XL.1 controller, $340) or Primus (AIR-X controller, $285) solve this, but verify resistor wattage matches turbine rating—undersized dump loads burn out quickly.
Failed rectifier bridge: Three-phase turbine output must be rectified to DC before battery charging. A shorted diode in the bridge creates a partial short circuit across two phases, dramatically reducing output and generating heat. Measure AC ripple at the controller's battery output; readings above 0.5 VAC ripple indicate rectification problems. Controllers with external rectifiers (common on Aeolos and Windmax turbines) allow diode replacement; integrated designs require controller replacement.
Dead gate driver or microcontroller: The controller receives turbine voltage but ignores it, showing no LED activity or displaying nonsensical voltage readings. These faults require manufacturer repair or replacement. Before scrapping the unit, disconnect all wiring, wait 10 minutes for capacitors to discharge, then reconnect battery first, turbine second. Some controllers enter lockout mode after voltage transients and need a cold boot to reset.
Evaluate battery health and charge acceptance
A battery bank that refuses charge defeats even a perfectly functioning turbine system. Lead-acid batteries develop sulfation when stored below 12.4 V for extended periods; lithium cells suffer from low-voltage disconnect damage if drained below manufacturer cutoff (typically 2.5 V per cell).
Perform a capacity test. Disconnect the turbine, charge the battery to full with a benchtop charger, then discharge through a known load (a 50 W resistor or DC-to-AC inverter powering a lamp) while monitoring voltage. A healthy 100 Ah 12 V battery should deliver 50 W for 20+ hours before voltage sags below 11.5 V. Banks that drop to 11 V within 5 hours have lost capacity through sulfation or grid corrosion.
Check for high internal resistance. While the turbine attempts to charge, measure battery terminal voltage, then measure again directly at the battery posts (bypassing terminal connectors). A difference exceeding 0.2 V indicates corroded terminals or failing inter-cell connections. Tighten terminals, clean with a wire brush and baking-soda solution, then retest. AGM and gel batteries hide corrosion inside sealed cases; capacity testing is the only reliable diagnostic.
Battery temperature affects charge acceptance. Lead-acid banks below 40°F accept charge sluggishly because electrolyte viscosity increases and chemical reaction rates slow. A battery showing 13.2 V while sitting in a 25°F shed might reach 14.6 V (proper absorption voltage) if moved to a 70°F space. Lithium iron phosphate cells refuse all charge below 32°F without internal heaters. Before condemning batteries, rule out cold-soak conditions.
Inspect wiring and connections
Voltage drop from resistance costs power as heat. A turbine generating 300 W that loses 10% to wiring delivers only 270 W to the battery—the missing 30 W warms up copper instead of storing energy. This loss compounds over years, shortening battery life through chronic undercharging.
Calculate acceptable wire gauge. NEC Article 705 combines with turbine amperage to set minimums. For a 400 W turbine on a 12 V system, expect peak current around 35 A (400 W ÷ 12 V × 1.25 safety factor). At 50-foot run, 8 AWG copper (40 A rating in free air) keeps voltage drop below 2%. Many budget turbines ship with 10 AWG wire; upgrading to 6 or 8 AWG recovers the lost power. Use stranded wire rated for outdoor exposure (THWN-2 minimum).
Inspect every termination. Wind vibration loosens crimp connectors and terminal screws. Wiggle each connection while monitoring voltage; a reading that fluctuates more than 0.3 V reveals intermittent contact. Replace crimp lugs with proper hydraulic crimps or tin-plated copper terminals, then seal with adhesive-lined heat shrink. MC4 connectors (borrowed from solar installations) provide weather resistance and pull-apart convenience but must be genuine Stäubli or Amphenol products—counterfeit MC4s from marketplaces develop micro-arcing that carbons the contacts.
Ground wire integrity matters for safety and electromagnetic compatibility. Measure resistance between turbine tower and ground rod; NEC requires below 25 Ω for driven rods, though 10 Ω or less provides better lightning protection. A corroded ground clamp or broken wire creates return-path voltage that can confuse charge controllers or damage electronics during nearby lightning strikes.
| Symptom | Turbine Output Voltage | Controller Input Voltage | Controller Output Voltage | Likely Cause |
|---|---|---|---|---|
| Turbine spins, no charging | 25-40 VAC | 0-2 VDC | Battery resting voltage | Blown rectifier in controller |
| Intermittent charging | Fluctuates ±5 V | Stable | Follows input fluctuations | Loose crimp connector or vibration-damaged wire |
| Dump load stays hot | 28 VDC | 28 VDC | 12.6 V | Shorted dump-load transistor |
| Voltage present, no current | 30 VDC | 30 VDC | 13.8 V | Sulfated battery or failed cell |
| Normal voltage, low power | 24 VDC | 22 VDC | 12.4 V | Undersized wire or corroded terminals |
Address mechanical issues affecting generation
A turbine must spin efficiently to generate rated output. Blade pitch changes, bearing drag, and brake engagement all affect electrical production.
Furling mechanisms on horizontal-axis turbines protect against over-speed by turning the rotor out of the wind. When furling springs weaken or hinge pivots corrode, the tail swings too early, keeping the turbine partially furled even in moderate wind. The blades spin but produce only 40-60% of expected voltage. Inspect the furling axis for seized pins or bent springs. Bergey Excel turbines use a dual-spring system that should return the rotor to face-on at 25 mph; single-spring aftermarket replacements furl prematurely and cut production.
Vertical-axis turbines develop imbalanced drag when one blade deforms or collects ice. The rotor spins but wobbles, creating AC voltage with uneven phase peaks. A three-phase controller expecting balanced input may shut down or enter fault mode. Hand-rotate the rotor slowly and watch for binding or offset balance; blades should track identically. Aeolos V-series turbines with curved blades sometimes develop stress cracks at the hub attachment; these cracks allow the blade to flex, throwing the rotor out of balance.
Manual brakes or electronic braking systems can partially engage without full activation. Many turbines use a shorting brake: the controller connects turbine phases together during shutdown, creating a magnetic field that resists rotation. If the brake relay sticks halfway, it imposes constant drag. Disconnect the brake circuit and observe if rotor speed increases; a jump from 80 RPM to 120 RPM at the same wind speed confirms brake drag. Clean the relay contacts or replace the contactor.
Rule out site-specific power limitations
Wind resource varies with height and terrain far more than solar insolation. A turbine that charged reliably for two years might underperform after neighboring trees grow taller or a new building disrupts wind flow.
Measure actual wind speed at hub height during testing. A handheld anemometer at ground level will read 30-40% lower than wind at 30 feet up. Most small turbines need sustained 10+ mph at hub height to begin useful charging; gusts don't count. If site wind now averages 7 mph when it formerly averaged 12 mph, the turbine operates below its performance curve, generating voltage too low to overcome battery resting potential.
Tower height directly controls production. Raising a turbine from 20 feet to 35 feet typically increases annual output by 30-45% due to clearer wind and reduced turbulence. NEC Article 705 and FAA Part 77 regulations govern tower height; structures under 200 feet AGL generally don't require FAA notification, but local zoning may impose stricter limits. Verify tower guy wires remain tensioned—a leaning tower forces the turbine to crab sideways through the wind, cutting effective swept area.
Check for electrical interference. Nearby RF transmitters, variable-frequency drives, or inverters can inject noise into turbine wiring, causing charge controllers to misread voltage or current. Symptoms include erratic LED displays, random shutdowns, or charging that stops when specific equipment operates. Separate turbine wiring from other circuits by at least 18 inches, use twisted-pair cable for long runs, and install ferrite chokes on controller input leads if interference persists.
Step through a methodical test sequence
When multiple symptoms overlap or initial tests prove inconclusive, follow this decision tree:
Confirm blade rotation. No spin = mechanical fault (bearing, brake, or blade damage). Fix before electrical diagnosis.
Measure open-circuit turbine voltage. Disconnect from controller, test in 15+ mph wind. No voltage = turbine internal fault (winding, rectifier, or slip ring). Proceed to turbine disassembly.
Measure voltage drop from turbine to controller. Reconnect, measure at both ends simultaneously. Drop exceeds 3% = wiring upgrade required (larger gauge or shorter run).
Observe controller behavior under load. Input present, output absent = controller failure. Input and output present but no current flow = battery issue or ground fault.
Load-test batteries. Disconnect turbine, use benchtop charger to full, then discharge through resistive load. Voltage collapse under light load = replace battery bank.
Check dump-load operation. Battery at full charge (14.4+ V for lead-acid), dump load should activate. Dump hot with low battery voltage = replace controller.
This sequence isolates faults without redundant tests. Each step confirms one subsystem before moving to the next.
Know when to call for professional help
Small wind systems involve lethal voltages (open-circuit spikes can exceed 100 VDC), falling hazards (tower work), and electrical code compliance (NEC Article 705 interconnection requirements). Three scenarios demand a licensed electrician or turbine technician:
Tower climbing for turbine inspection. Work above 15 feet requires fall protection; OSHA regulations (1926.502) mandate harnesses, lanyards, and anchor points rated to 5,000 pounds. Turbine manufacturers including Bergey and Primus offer factory service or recommend certified technicians for hub-height work. Cost ranges from $400-$800 for inspection plus repairs.
Interconnection with utility grid. Systems that feed excess power back through a bi-directional meter must pass utility inspection and meet NEC 705.12 point-of-connection rules. An improper interconnection can back-feed the grid during an outage, endangering utility workers. Licensed electricians file permit paperwork and coordinate inspection—necessary steps for the 30% federal Residential Clean Energy Credit (IRC §25D).
Controller or turbine replacement involving three-phase wiring. Miswiring phases can destroy controllers instantly or create unbalanced magnetic fields that overheat windings. If the repair involves more than terminal tightening or wire replacement, professional installation protects expensive components and maintains warranty coverage.
Why does my turbine charge only during strong gusts but not steady wind?
The charge controller may have an incorrect cut-in voltage setting. Many controllers require turbine output to exceed battery voltage by 2-3 V before beginning charge; if wind speed varies and momentarily drops output below this threshold, charging stops. Alternatively, loose wiring creates intermittent contact that breaks during vibration, reconnecting during gusts when vibration patterns change. Verify controller settings match turbine specifications and inspect all crimp connections.
Can I replace a failed charge controller with a solar MPPT controller?
Not reliably. Wind turbine controllers must handle variable-frequency AC input (or rectified DC with high ripple), dump-load switching for over-voltage protection, and braking circuits for shutdown. Solar MPPT controllers expect steady DC input from predictable sources and lack dump-load outputs. Hybrid controllers from Xantrex (XW-MPPT 60-150) work with both but cost $600-$1,200. Using an incompatible controller voids turbine warranty and risks damage during high-wind events when the controller cannot divert excess energy.
How can I tell if batteries are too cold to accept charge?
Lead-acid batteries accept charge sluggishly below 40°F and suffer permanent capacity loss if charged hard while frozen. Lithium iron phosphate cells refuse charge entirely below 32°F; attempting to force current causes lithium plating that kills the battery. Install a battery temperature sensor (most charge controllers have provisions) and insulate the battery box. If batteries repeatedly sit below 50°F, add a thermostatic heating pad (20-40 W) powered by the turbine—the self-heating effect improves charge acceptance and extends lifespan.
My turbine voltmeter shows 28 V but the battery never rises above 12.6 V. What failed?
The charge controller's pass-through circuit has likely failed open—it receives turbine power but cannot switch it to the battery output. This can result from a burned MOSFET, damaged gate driver IC, or open fuse on the output side. Test by measuring continuity between controller input and output with all power disconnected; infinite resistance confirms an open circuit inside. Replacement is typically more cost-effective than repair for controllers under $400.
How long should a wind turbine charge controller last?
Quality controllers from Morningstar, Xantrex, or Outback Power typically survive 10-15 years in properly installed systems. Budget units from unbranded Chinese manufacturers average 3-5 years. Lifespan depends on cumulative energy throughput, number of over-voltage events (lightning-induced surges or sudden load disconnections), and thermal cycling. Controllers mounted in direct sun or unventilated spaces age faster due to heat stress on electrolytic capacitors and power semiconductors. Providing shade and airflow doubles service life.
Bottom line
A wind turbine that spins but doesn't charge almost always suffers from a charge controller fault, wiring voltage drop, or degraded battery capacity. By measuring voltage at three points—turbine output, controller input, and battery terminals—you isolate where power disappears. Most failures cost $100-$400 to fix with a replacement controller or battery service, far less than replacing the entire turbine. For any work involving tower climbing, utility interconnection, or three-phase wiring, NEC Article 705 and local code require a licensed electrician to maintain safety and code compliance.
Share this article
windturbinehome.com/s/6fca42
Editorial note: This article was researched and written by a member of the Wind Turbine Home editorial team. AI-assisted tools were used for spell-checking and light grammar review only — all research, analysis, and conclusions are our own. Our editorial policy prohibits sponsored content and paid placements. Read our editorial policy →
Related reading
maintenance troubleshooting
Winterizing Your Home Wind Turbine: Pre-Winter Checklist
Prepare your residential wind turbine for winter with this comprehensive maintenance checklist covering blade inspection, electrical systems, and tower safety.

maintenance troubleshooting
How to Balance Homemade Wind Turbine Blades Without Lab Equipment
Balance DIY wind turbine blades using household items: paint stirrers, fishing line, and sandpaper. Static and dynamic methods reduce vibration by 70-90%.
maintenance troubleshooting
Charge Controller Fault Codes: What They Actually Mean
Decode your wind turbine charge controller fault codes with this practical guide covering overcurrent, overvoltage, temperature errors, and sensor failures.

maintenance troubleshooting
A Realistic Annual Maintenance Schedule for Small Wind Turbines
Monthly visual checks, quarterly bolt torque, semi-annual blade inspections, and annual electrical testing keep small wind turbines safe and productive for 20+ years.

maintenance troubleshooting
Wind Turbine Ice on Blades: Detection, Mitigation & Shutdown
Ice buildup on wind turbine blades reduces efficiency by 20-80% and increases structural stress. Learn detection methods, heating systems, and safe shutdown protocols.

maintenance troubleshooting
Wind Turbine Slip Ring Replacement: Complete Service Guide
Learn when and how to replace slip rings in residential wind turbines. Step-by-step walkthrough covering diagnosis, tools, safety, and cost for HAWT and VAWT systems.

maintenance troubleshooting
How to Lubricate Wind Turbine Bearings: Schedule & Grease Guide
Learn proper bearing lubrication schedules, NLGI grade selection, and access methods for residential wind turbines to prevent costly failures and extend service life.

maintenance troubleshooting
Wind Turbine Yaw Motor Not Working: Diagnosing and Fixing
Yaw motor failures lock turbines facing the wrong direction, costing 30-70% of power. Learn to diagnose controller faults, seized bearings, and wiring issues.

maintenance troubleshooting
How to Brake a Runaway Wind Turbine Safely | Emergency Stop
Learn three proven methods to stop a runaway residential wind turbine: dynamic braking, manual furling, and emergency disconnect. Quick action prevents damage.