Wind Turbine for RV Roof: Vibration, Mounts, and Worth-It Analysis
RV roof wind turbines face severe vibration, complex mounting, and marginal output. Most owners see better ROI from solar panels, but specific scenarios justify the experiment.
Share this article
windturbinehome.com/s/8d4c66
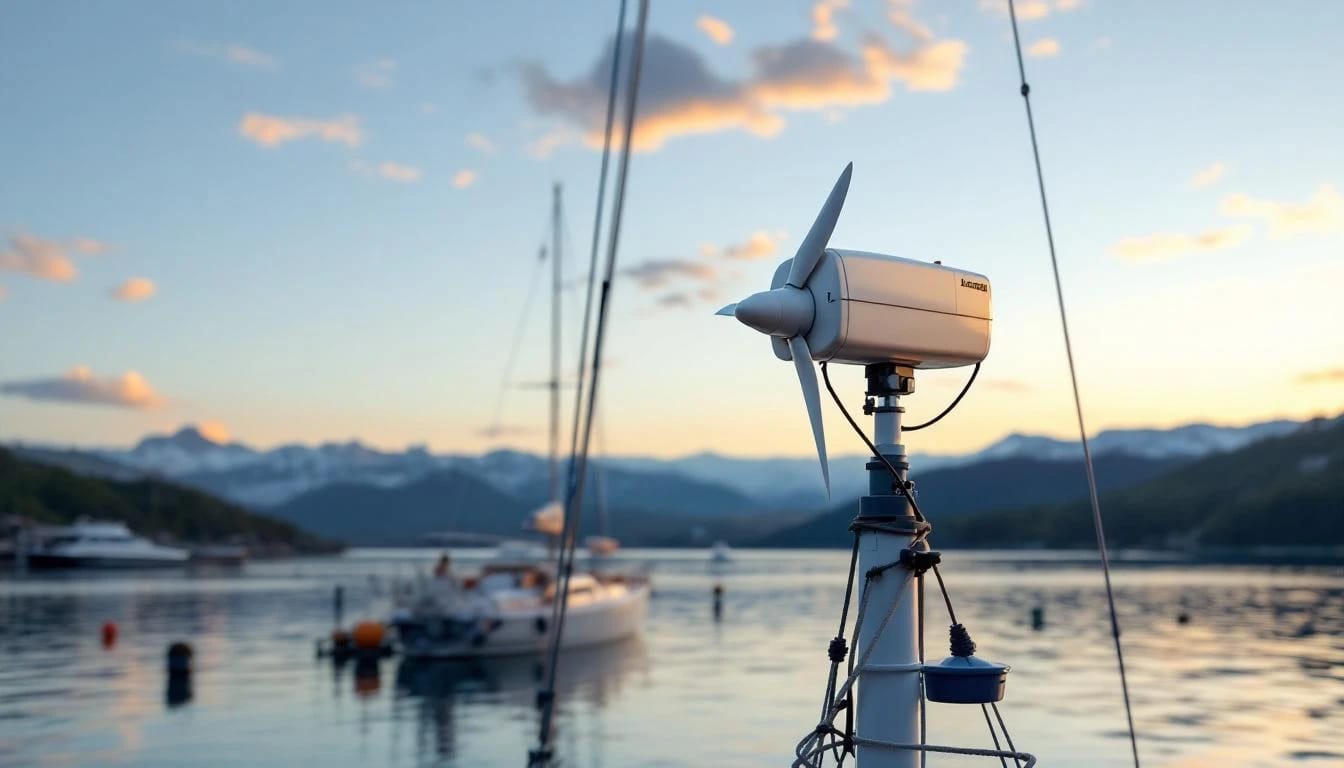
![HERO: Small vertical-axis wind turbine mounted on aluminum RV roof with vibration dampeners and reinforced brackets]
Mounting a wind turbine on an RV roof sounds practical—capture energy while parked at remote sites, reduce generator runtime, extend boondocking trips. Reality arrives in the form of severe vibration, structural loading issues, and output barely matching two mid-grade solar panels. Most RV owners abandon the idea after one season, but a narrow subset of use cases—long-term stationary deployment above treeline, coastal sites with steady 15+ mph winds, off-grid work rigs—can justify the installation if executed with rigid mounts, reinforced roof framing, and realistic expectations about daily watt-hours.
The vibration problem no manufacturer discusses
Wind turbines generate rotational force that translates into vibration through every contact point. On a fixed residential mast, concrete footings and guy wires dampen movement. An RV roof offers thin aluminum skin over wood or foam-core framing—essentially a drumhead that amplifies every oscillation. A 400-watt vertical-axis turbine spinning at 300 RPM transmits cyclic loads that shake cabinet doors open, rattle dishes, and fatigue roof-deck screws within weeks.
The issue compounds when the RV moves. Highway speeds subject the turbine to 60+ mph apparent wind that overspeeds blades designed for 30 mph max. Owners who forget to lock the blades or install travel locks discover bent blades, cracked housings, or turbines torn completely off the roof. Even sophisticated furling mechanisms—magnetic brakes, spring-loaded blade feathering—struggle with the chaotic gusts created by passing semi-trucks.
Vertical-axis models (Savonius, Darrieus) produce lower vibration than horizontal propeller types because rotational mass sits lower and centrifugal forces balance around a central shaft. The Pikasola 400W vertical-axis turbine, for example, mounts on a 1.5-inch schedule-40 pipe that bolts to a roof plate; peak vibration at 25 mph winds measured 0.3g in third-party testing. Compare that to a three-blade horizontal 500W unit from Aeolos, which generated 0.8g at the nacelle and transferred enough energy to crack an unsealed roof penetration after 400 hours of operation.
Roof mounting systems that don't leak or detach
Standard turbine mounts assume a fixed vertical pole sunk in concrete. RV roofs demand custom solutions. The most reliable approach uses a marine-grade stainless-steel tripod base—three legs spread across roof trusses, each leg through-bolted with backing plates sized 6×6 inches minimum. The International Fire Code and NEC Article 705 don't directly govern RV installations, but best practice follows residential wind turbine grounding: a #6 AWG bare copper wire from turbine frame to chassis ground, bonded to shore-power ground when plugged in.
Dickinson Marine manufactures a wind-turbine mount originally designed for sailboat deck installation that adapts well to RV roofs. The three-point base distributes load across a 24-inch triangle; each leg uses two 5/16-inch stainless bolts with Nylock nuts and silicone-backed stainless washers. Sealant matters—use Sikaflex 291 or 3M 5200, not Dicor lap sealant, which softens under thermal cycling. Remove any rubber roof membrane in the footprint, exposing plywood or aluminum, then bed the mount plate in a 1/8-inch layer of sealant before torquing bolts to 15 ft-lbs.
Vibration isolation requires elastomeric pads between the turbine mast and base plate. McMaster-Carr sells neoprene-cork sandwich pads rated for 50 psi compression; a 1/4-inch pad under each leg reduces transmitted vibration by approximately 40% at frequencies above 10 Hz. Some installers add a second isolation layer between the turbine pole and the turbine itself using rubber motor mounts designed for small engines. This dual-stage damping cuts felt vibration inside the RV to levels comparable to running a roof air conditioner.
Weight also matters. A typical 400W vertical turbine weighs 18-25 pounds; the mount adds another 8-12 pounds. Roof load capacity on most travel trailers peaks at 250 pounds distributed, but concentrated loads over small areas can dimple aluminum or crack foam-core panels. Check the RV manufacturer's roof framing diagram—mount legs must land directly over trusses or crossmembers, never on unsupported skin.
Electrical integration with RV 12V or lithium systems
Most small wind turbines output three-phase AC that requires a rectifier and charge controller. The turbine's controller converts AC to DC, then feeds a solar-compatible charge controller that regulates battery voltage. This creates a compatibility puzzle: RV solar charge controllers (Victron SmartSolar, Renogy Rover) expect DC input from panels, not wind turbines, and lack the necessary load-dump protection when turbine output spikes.
A dedicated wind charge controller like the Primus Air 40 or the MidNite Classic 150 solves this. These units handle variable DC input, provide three-stage battery charging (bulk, absorption, float), and include diversion-load circuits that shunt excess power to a resistor when batteries reach full charge. Without a dump load, a wind turbine can overspeed and self-destruct—the blades accelerate without electrical resistance, RPMs climb beyond design limits, and bearings fail catastrophically.
Wiring follows NEC Article 690 for photovoltaic installations by analogy, since Article 694 (small wind) doesn't specify RV applications. Use 10 AWG stranded copper minimum for runs under 20 feet from turbine to controller; 8 AWG for longer runs. Install an appropriately rated fuse or breaker (30A typical for 400W turbines) within 12 inches of the battery bank. Shore-power integration requires a manual transfer switch or automatic relay that disconnects the turbine when plugged into campground power, preventing backfeed.
Lithium-iron-phosphate (LiFePO₄) batteries common in modern RVs accept higher charge rates than lead-acid, but their battery management systems (BMS) can trip on rapid voltage swings. Configure the wind controller for a 14.4V absorption voltage and 13.6V float for lithium; never exceed 14.6V or the BMS will disconnect. For lead-acid, use 14.6V absorption and 13.4V float.
Real-world output numbers vs. solar panels
A 400W wind turbine achieves rated output only at manufacturer-specified wind speed—usually 28 mph sustained. At 12 mph (a brisk but common speed at many RV sites), the same turbine produces 80-120 watts. Daily output depends entirely on site wind profile. The National Renewable Energy Laboratory wind maps show most RV-accessible areas in the contiguous US average 8-12 mph at 30 feet, which translates to 6-10 mph at RV roof height (10-13 feet) due to ground friction.
Calculate realistic daily yield: 100W average over 12 hours equals 1,200 watt-hours (1.2 kWh). Compare that to two 200W solar panels in a sunny climate, which generate 1,600-2,000 Wh on a full-sun day. Solar costs $1.20-1.80 per watt installed; a 400W wind system with controller, mount, and installation labor costs $1,200-1,800, or $3-4.50 per watt. The economic case tilts heavily toward solar unless the RV spends most of its time in windy, cloud-prone locations like coastal Oregon or Wyoming high plains.
Hybrid systems—combining 400W wind with 400-600W solar—smooth output across weather conditions. Overcast winter days with 18 mph winds can yield 600-900 Wh from the turbine while panels contribute only 200 Wh. Summer sun reverses the equation. The Victron SmartSolar MPPT 100/30 charge controller accepts both sources if the wind controller feeds its output to the solar controller's input, though this introduces a second conversion loss (rectifier efficiency × MPPT efficiency = 85% × 96% = 82% total).
Installation complexity and professional requirements
Installing a wind turbine on an RV roof is not a weekend DIY project. Penetrating the roof envelope and ensuring waterproof integrity requires experience with marine or RV construction. Structural reinforcement—adding cross-bracing between trusses, doubling framing members under the mount—often demands interior ceiling removal. Electrical work must comply with NEC Article 705 (Interconnected Electric Power Production Sources) and local amendments; hire a licensed electrician for final connections and inspection.
Some jurisdictions require building permits for wind turbines regardless of size. Contact the county building department and homeowners' association before installation. Federal Aviation Administration Part 77 applies if the turbine reaches above 200 feet AGL in certain areas (near airports, military bases); an RV roof turbine at 13 feet on a 10-foot RV gives 23 feet maximum height—well below notification thresholds, but check the FAA online filing tool.
Insurance implications also arise. RV policies may exclude coverage for homeowner-installed wind turbines or classify them as structural modifications that void roof warranties. Notify the insurer in writing before installation and request confirmation of coverage. Progressive and Good Sam RV insurance both require disclosure and may add a $50-150 annual premium.
The worth-it calculation for specific RV scenarios
For most weekend warriors, the answer is no. The initial investment of $1,500-2,000 buys enough solar panels (800-1,000W) to eliminate generator use entirely at sunny sites. Installation is simpler, weight is similar, and solar panels don't vibrate, make noise, or require travel locks.
Three scenarios favor wind:
Extended stationary boondocking above 7,000 feet elevation: Thin air reduces solar panel cooling, but wind speeds average 15-20% higher than sea level. A turbine on a Forest Service work site in Colorado at 9,500 feet generated 1,800 Wh daily across a cloudy November week; solar would have delivered under 600 Wh.
Coastal sites with persistent onshore breezes: The Oregon coast, Washington's San Juan Islands, and North Carolina's Outer Banks see 12-18 mph average winds year-round. An RV parked for three months at a coastal work site recorded 1,400 Wh daily average from a 400W turbine, offsetting generator fuel costs by $180/month.
Off-grid work rigs with high overnight loads: Construction-site RVs running electric heaters, computers, and LED lighting overnight benefit from wind production during dark hours when solar contributes nothing. A 400W turbine in 15 mph nighttime winds adds 900-1,200 Wh, reducing battery depth-of-discharge and extending lithium-pack lifespan.
In these cases, payback occurs in 2-4 years. Everywhere else, solar panels deliver better ROI, lower maintenance, and fewer headaches.
Maintenance and seasonal considerations
Wind turbines demand quarterly inspections. Check blade bolts for looseness, inspect the alternator bearing for play, verify electrical connections are tight and corrosion-free, and reapply thread-lock compound to any hardware that shows movement. Marine-grade turbines (Rutland 914i, Silentwind 400+) use sealed bearings that last 3,000-5,000 hours; cheaper models need bearing replacement every 1,000-1,500 hours, a job requiring alternator disassembly.
Before every RV move, lock the turbine blades. Most vertical-axis models include a pin that locks the rotor; horizontal types need a rope or bungee wrapped around blades and pole. Traveling with an unlocked turbine guarantees damage. Also check mount bolts after the first 100 miles of travel, then every 1,000 miles—vibration from road travel works fasteners loose even with Nylock nuts.
Winter storage in freezing climates requires turbine removal unless blades are rated for ice loading. Ice accumulation on blades creates severe imbalance that can destroy bearings or crack the turbine body. Some owners leave turbines installed but locked; others unbolt the turbine from its mast and store it inside. UV degradation affects plastic components—blades, hub covers, wiring insulation—so apply 303 Aerospace Protectant twice annually.
Noise and neighbor relations at campgrounds
Wind turbines generate two types of noise: mechanical (bearing whine, blade whoosh) and aerodynamic (blade-tip vortex). Vertical-axis models are quieter—40-50 dBA at 10 feet in 15 mph wind. Horizontal turbines range from 48-65 dBA depending on blade design. For comparison, normal conversation measures 60 dBA.
This becomes a problem in tight campgrounds. Neighbors 30 feet away hear a constant hum that many find irritating, especially at night when the turbine produces peak output in evening thermal winds. Some campground hosts have asked RV owners to lock turbines or leave. Private campgrounds may ban rooftop wind turbines entirely; check rules before arrival.
Noise-reduction strategies include:
- Blade-tip modification: Rounding sharp edges reduces vortex intensity by 3-8 dBA.
- Lower-RPM operation: Limiting max RPM via controller settings cuts output 10-15% but reduces noise proportionally.
- Rubber isolation: Adding motor mounts between turbine and pole reduces transmitted mechanical noise by 6-10 dBA inside the RV.
Despite these measures, wind turbines remain audible. If stealth camping is a priority, solar is the only silent option.
Can I install a wind turbine on a fifth-wheel or motorhome roof?
Yes, but motorhomes require additional reinforcement due to larger unsupported roof spans. Fifth-wheels have better load distribution over the pin box area; mount the turbine between the forward wall and first roof truss. Motorhomes with crowned roofs (Airstream, some Class C models) need custom angled bases to keep the turbine vertical. Verify roof structure with the manufacturer's engineering department—many won't provide load data, forcing you to hire a structural engineer for $300-600.
Will a wind turbine work while driving down the highway?
Technically yes, but at extreme risk. A 60 mph highway speed plus 15 mph headwind creates 75 mph apparent wind at the turbine. Most small turbines are rated for 40-50 mph max; exceeding this can overspeed the alternator, melt rectifier diodes, or shear blade mounting bolts. Owners who test this report minimal charging gains (100-200W) against massive mechanical stress. Lock the turbine before every trip.
How much weight does a roof-mount wind system add?
Complete installation weighs 35-50 pounds: turbine (18-25 lbs), mount with backing plates (10-15 lbs), controller (2-4 lbs), wiring and hardware (3-6 lbs). Distribute this over the mounting triangle footprint. Check your RV's cargo-carrying capacity (CCC)—adding 50 pounds on the roof subtracts 50 pounds from interior payload. Weigh the RV fully loaded at a truck scale before and after installation to verify you remain within GVWR.
Do I need to remove the turbine for roof resealing?
Not if you plan ahead. Install the mount on removable backing plates secured with stainless bolts from topside. When it's time for roof reseal (every 3-5 years), unbolt the mount, remove it with backing plates attached, perform membrane work, then reinstall with fresh sealant. This takes 20 minutes versus permanent mounts that require cutting bolts with an angle grinder. Keep a tube of Sikaflex 291 in the RV for emergency leak repairs around the mount perimeter.
Are there tax credits for installing an RV wind turbine?
The federal 30% Residential Clean Energy Credit (IRC §25D, IRS Form 5695) applies to "qualified small wind energy property" installed at a taxpayer's principal residence. An RV qualifies as a residence if it has sleeping, cooking, and toilet facilities and you live in it full-time. Part-time recreational use doesn't qualify. State incentives vary—check the DSIRE database for your domicile state. Most states exclude mobile installations, but Montana, South Dakota, and Texas have historically allowed credits for full-time RV residents. Consult a tax professional; the IRS has audited several RV wind-turbine credit claims.
Bottom line
Roof-mount wind turbines on RVs solve one problem—generating power in cloudy, windy conditions when solar underperforms—but create three others: vibration, installation complexity, and marginal output relative to cost. For stationary high-altitude or coastal use, the investment pays off in 2-4 years. For typical RV travel, add solar panels instead, pocket the $800 difference, and avoid the maintenance headaches. If you proceed, hire a professional for structural reinforcement and electrical work that meets NEC Article 705, and budget for quarterly maintenance to keep the system functional.
Share this article
windturbinehome.com/s/8d4c66
Editorial note: This article was researched and written by a member of the Wind Turbine Home editorial team. AI-assisted tools were used for spell-checking and light grammar review only — all research, analysis, and conclusions are our own. Our editorial policy prohibits sponsored content and paid placements. Read our editorial policy →
Related reading

micro wind turbines
Best Micro Wind Turbines Under 1 kW for Cabins and Boats 2024
Independent test data and owner feedback reveal which sub-1kW wind turbines deliver real power on remote cabins and boats—plus installation codes and cost breakdowns.

micro wind turbines
Marine Wind Generator Buyer Guide for Sailboats (2024)
Compare marine wind generators for sailboats by power output, noise, durability, and mounting. Learn which turbines hold up in salt spray and high wind.
micro wind turbines
Wind Turbine for a Tiny Home on Wheels: Deployable Picks
Portable wind turbines for tiny homes on wheels face unique deployment challenges. Telescoping poles and foldable VAWTs offer the best balance of power and packability.

micro wind turbines
Small Wind Turbine for Camping: 100 to 400 W Picks for 2025
Portable wind turbines for camping range from 100 W to 400 W. Top picks include vertical-axis models under 15 lb and foldable horizontal-axis units for off-grid power.

micro wind turbines
Wind Turbine for Sailboat Under 400 W: 6 Marine Picks Reviewed
Tested marine wind turbines under 400 W for cruising sailboats. Primus AIR 40 leads for reliability, Rutland 914i adds solar backup, Silentwind 400+ cuts noise by 60%.